How to Convert a PSD Template to WordPress Theme?
Nowadays, PSD to WordPress change has become an exceptionally advanced and smart way to build your site, and it needs uncomplicated learning of WordPress. This changing over can take about two or three days to several months depending upon how complex a WordPress theme is. In any case, once you grasp the refined elements, it turns into a transformation of worth knowing.
A large portion of WordPress specialists trust that with a touch of coding learning, you can make striking visuals of your website page. On the contrary, when you utilize Photoshop to make a website composition, the story is a ton unique.
It is the main part we will cover in this post. Here you’ll find out about the means that will help you in your PSD to WP Conversion.
A NOTE OF CAUTION: This mission incorporates the ravenous utilization of HTML, CSS, and PHP code that requires fundamental learning of every one of these dialects. If you don’t mind ensure that you have the required aptitude before enjoying the strategy then you are free to go on.
Now let’s kick into the main topic:
What is PSD?

PSD and WordPress themes are two terms that needn’t bother with the description in the kingdom of web designing. PSD is essentially a Photoshop Document made by Adobe Photoshop. It is a serviceable document that gives you a chance to replace and alter parts of the picture into isolated jpeg or png records. This is where you can spill out the entirety of your imaginative capacities to make your handcrafts. You can just open a PSD document in Photoshop and do any altering tasks whenever.
What WordPress Themes Are?
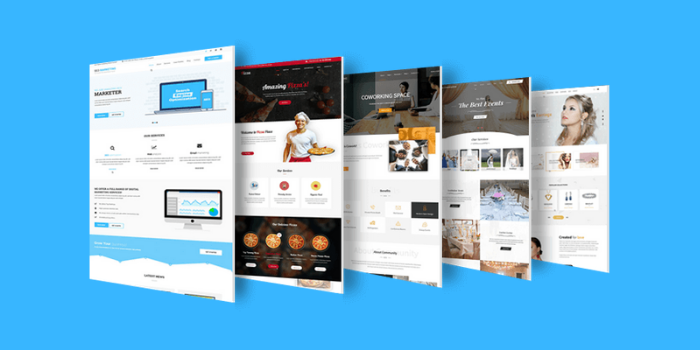
Expecting that you’re new to WordPress themes, enable me to clarify it in a most straightforward frame to you. Consider WordPress themes like your cell phone themes. Similarly, as a versatile theme chooses the look and feels of your smartphone – the icons and the wallpaper, the navigation and the likes; a WordPress theme gives the essential visual character to your site or blog.
A WordPress theme is fundamentally a gathering of documents, in fact, called as layouts, which choose the essential look and feel of your site.
How to Convert PSD to WordPress Themes?

Now, we should center towards the real worries here. How might you do a PSD to WordPress Conversion? Let me assume, you are prepared to set out your innovativeness on the canvas of WordPress. Now, how about we kick into the main point!
You Need To Slice Your PSD Image
The designing procedure here begins with cutting and splitting your PSD picture. Here, just your Photoshop abilities will work, and you can isolate all the design segments independently.
You should make sure what you need to keep static and what segments you need to make dynamic on your site.
Adjusting your pictures’ amount is the best gamble for you. It is because of the more the pictures the slower the site is. Along these lines, keep a sensible sign of what you need to keep static and what you need dynamic on your site. The best practice to cut your PSD document into pieces is,
- Cut the foundation
- Cut the header and the separator
- Cut the footer
It is the most ideal approach to cut your PSD records into several small pictures.
READ MORE>>> Simple Ways to Convert PSD Files into WordPress
Now Move To index.html and Style.css
Followed by the completion of Photoshop, the time has come to move to the universe of programming. But don’t worry, this is just a simple stage. Once you’ve created your PSD design, you need to create a static HTML file and a CSS file. Name them appropriately as index.html and Style.css. It will make things easy for you in the future.
Tons of software are there such as Dreamweaver and Fireworks which will make this step much simpler. But I’ll suggest you to, learn a little bit of HTML and CSS which certainly will keep you informed of the proceedings. W3Schools and other developers’ communities can come out as a great helping platform in this regards.
Don’t ever forget to place the PSD components in the right positions with the help of the index.html and Style.css file. A responsive layout can also be applied to make the design attractive.
Break down your index.html into WordPress theme file structure
This time around, as you have the essential layout prepared so you have to port it to the WordPress setting. Yet, before you do that you may require a little learning on how things are composed in WordPress.
WordPress has a particular type of structure that you have to follow. You are basically going to transfer your site page to WordPress themes and WordPress programming should work with it consistently so that the plugins and additional functionalities can be included with no issues of inconsistency.
So pass through the WordPress standard document structure and break your index.html record appropriately into the fundamental .php documents.
Two noteworthy files that make up a WordPress theme are the index.php and the style.css documents. Other than these, a regular WordPress theme comprises of numerous PHP records for the fundamental highlights like header.php, archive.php, sidebar.php, footer.php et cetera.
So now it is your obligation to do this sort of compartmentalization of code and separate your index.html into the necessary feature .php files. Try not to take stress on the chance that you attempt is being scary. There are such huge numbers of free tutorials out there that can enable you to complete this task with great ease.
A few pointers that may help you are recorded down under.
How about we show you the basic files of WordPress Themes! :
- Index.php
- Sidebar.php
- Header.php
- Footer.php
- Style.css
- Rtl.css
- Comments.php
- Front-page.php
- Home.php
- Single.php
- Page.php
- Category.php
- Tag.php
- Date.php
- Archive.php
- Search.php
- Attachment.php
- Image.php
- 404.php
style.css
The main stylesheet: This file must be attached to the Theme, and it will contain the header information of the theme.
rtl.css
The RTL stylesheet. This CSS file will be included automatically.
index.php
The main template file: It is the parent file of the template.
comments.php
This file defines the comments template.
front-page.php
The front page template: it is only used for a static front page.
single.php
It’s used when a single post is queried. For this and all other queries, index.php is used if the query template is not present.
page.php
It’s rs used for individual page templates.
category.php
It’s required to show the categories.
tag.php
It’s rs required when the tag is needed.
date.php
To display the date/ and time we need this template page.
archive.php
Used when an author, category, or date is queried. Note that this template will be reversed by category.php, author.php, and date.php for their respective query types.
search.php
To perform a search we need this file inside the template.
404.php
The 404 Not Found template is to display the error message when the post is not found.
Adding WordPress Inbuilt Function Tags in the Theme Files
Each theme file has specific functions and purposes, and WordPress makes it easy to activate these functionalities by simply adding the WordPress inbuilt function tags into these files.
To learn more about each of these functionalities and tags, you are referred to the following resources provided by WordPress:
Function Reference – Provides point by point description of each of these functionalities with examples for your reference.
Template Tags – Provides a full list of all WordPress function tags and their description.
Once these tags are added to the files, they are then gathered into a solo theme folder that will be part of the WordPress installation process. These theme files would then be able to be activated through the WordPress dashboard.
Including More Functionalities
The theme documents give the fundamental functionalities of your WordPress stage. In the event that you require more functionalities that perform any particular tasks and events, you can add plugins and add-ons that can be set-up and activated through the WordPress dashboard.
Setting Up, Adding Content and Testing Your WordPress Installation
After your theme files are finished and properly tagged with functionalities, you would then be able to install WordPress through your hosting resources, after which you can then activate your theme and begin customization works.
The method for installing WordPress is simple and exceptionally clear, which you can learn from the WordPress.org site. Followed by activating your theme, add your preliminary content to each of your pages and segments. Test every component carefully for the sake of checking whether they are functioning as per your intended design and plans or not.
Go Live!
When everything is set in their legitimate place and each component is tried for their effectiveness, you would then be able to populate your new WordPress site with more suitable substance and after that – Go Live!


About Author
usman
Usman Raza is the co-founder of Christian Marketing Experts and marketing strategist working with various brands online, and the content marketing manager of PSD to WordPress and Ionva. He is devoted to helping small businesses bridge success gaps by providing in-depth, actionable advice on digital marketing, SEO, and small business growth. Follow him on Twitter @usmanintrotech.